There have been a lot of installing Vista/Win7 via USB articles in the recent past, all using different types of methods. Now with Windows 7 round the corner and with the RC version being a success people have started to tryout Windows 7 and I’ve received a lot of mail, some stating it works and for some it doesn’t. Mainly there are responses about these methods being not easy to follow unless you have a fair knowledge about these stuff.
So in this tutorial I have used the easiest way to create a boot able USB that you can use to install Windows 7 (or Vista) and this will probably be the final post as well.
Creating the bootable USB drive:
Requirements
- An ISO Image of Windows 7 (any version)
- UltraISO (not free, but a trial version would do)
- A USB drive consisting more than 2.5GB (4GB drive is more than enough)
1. Download the ISO image of Windows 7
2. Download and install UltraISO
3. Plug the USB drive to the PC. backup any data as they will be deleted.
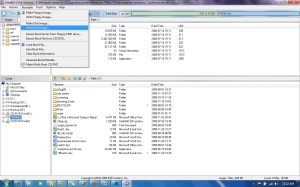
4. Start UltraISO go to File->Open and select the downloaded ISO image
5. In the Local tab (lower left) select your USB drive. Make sure its the drive you want to make bootable. In this example its “USB Flash (M:)”
6. Now click the Bootable tab from the menu and select Write Disk Image
7. In the Write disk image dialog box click Write. (You can also tick Verify, this will check the data for errors.)
8. Wait until the write operation finishes. Now you can use the USB flash drive to install Windows .
Hope this will help you more efficient then the way you usually do through the command mode.
Thank you for reading my blog.
Regards,
Udhyan.


very very helpful….thanks a lot udhyan
Good website for ultraiso serial key free download
Nice Post 🙂
thanks man!it works
nice information bro, thanks
Or you could do it for free with out using third party software https://technet.microsoft.com/en-us/library/jj200124.aspx